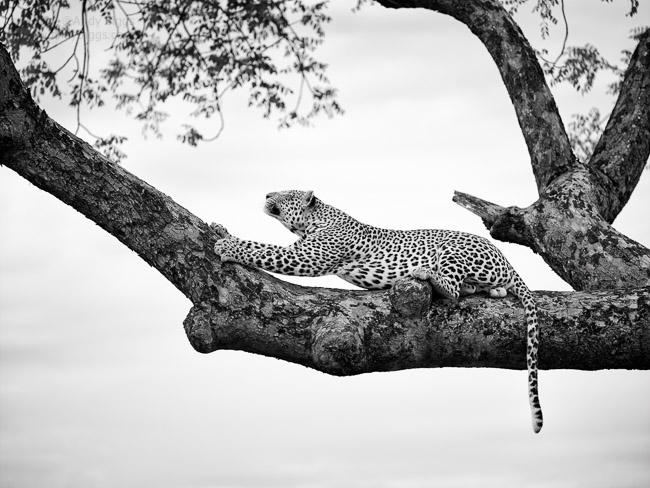
Stretching Leopard
Okavango Delta, Botswana
Phase One DF+, IQ280 80 megapixel digital back, Schneider 240mm lens
I have been wanting to write this blog entry for a while, however I knew that once I opened up the bag it would require a long post to say what I need to say about my move to medium format digital as my primary camera system. Please understand that I won’t be able to address every single aspect of the switch in this post, so I encourage you to use the comments section at the bottom of this post to carry on a longer dialogue if you have any follow-up comments or questions. So here goes.
Background
Back in 2002 I switched from 4x5” large format to a pair of Canon D30 3MP digital 35mm SLR’s. I made the switch from large format film to 35mm digital eagerly and with little hesitation. My main reason for the switch was that I was moving from shooting only landscapes to shooting African wildlife with frequent landscapes. I am a person who eagerly adopts and uses technology to solve problems, rather than running away from it and sticking my head in the sand in hopes that I don’t have to make any changes that will require work.
This switch to 35mm digital in 2002 taught me that I preferred the digital workflow to film, however the one thing that stood out above all others as a limitation was the small file size. I shot with these 3 megapixel cameras for about a year and captured some images I was happy with, however since that time I have decided that I won’t license or sell prints from these files due to my inability to create prints larger than 8x12 inches that I am happy with. You see, I create images in both color and black and white and I have found when you remove the color information from an image you have fewer aspects to carry it, and I like for a heavy dose of detail to be the leg that props the image back up.
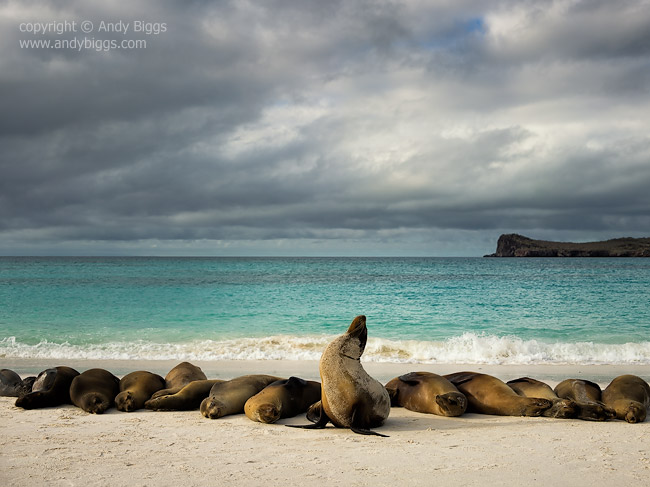
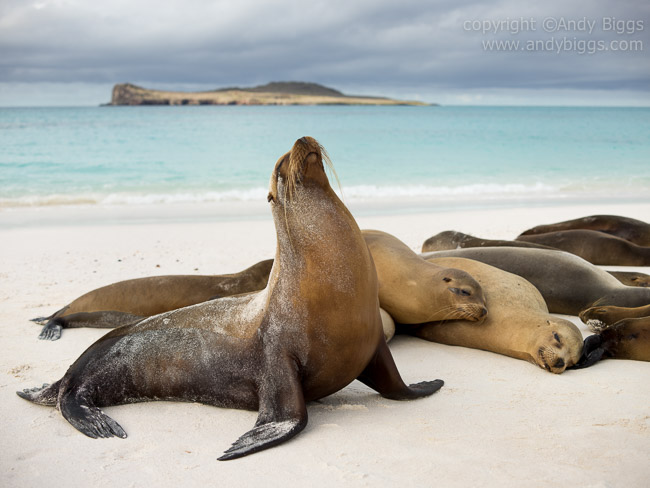
Rise Above The Rest (Sea Lions on a Beach)
Galápagos Islands
Phase One DF+, IQ280 80mp digital back, 75-150mm lens
Since 2002 I shot with Canon until 2009 when I switched over to Nikon. The switch occurred because I wanted to shoot with the Nikon 200-400mm f/4 VR, which is a wonderful focal length range for wildlife. Nikon also came out with their D3x camera, which was an industry-leading 24 megapixel camera in a pro level body. I was in heaven, as I could start making larger and larger prints that I was happy with. I experimented with numerous creative options, such as only shooting in a square format, as I had more pixels than I thought I would ever need. I had a custom-made ground glass for the D3x that was darkened on the sides so I could see and compose in the square format. It was liberating and a ton of fun, as it also allowed me to use shorter focal lengths to get what I wanted (the 300mm f/2.8 was my longest lens at that time).
Then the Nikon D800 came out. Whoa. Yes, I missed having a professional-grade camera body with top-notch autofocus, weather sealing and good frames-per-second, however the 36 megapixels allowed me to have a large enough file to really work with for 20x30, 24x36 or even 30x45” prints. I was super happy, and something changed with my shooting style at the same time.
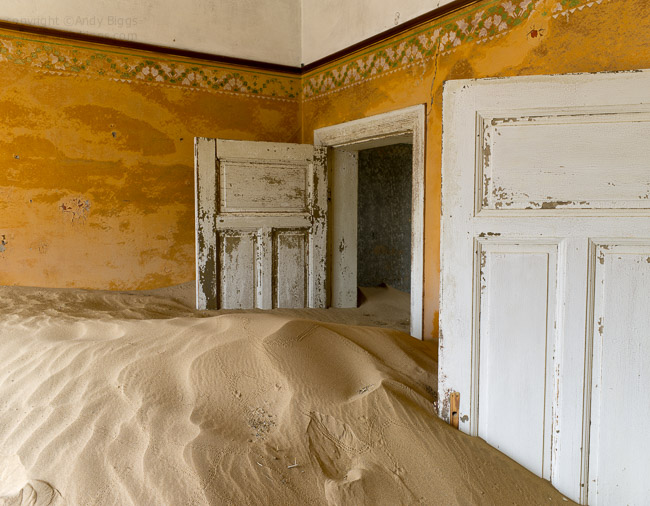
Kolmanskop Deserted Mining Town, Namibia
Phase One DF+, IQ280 80mp digital back, 45mm lens
The A-Ha Moment
After a few wildlife safaris in Africa, as well as a few landscape trips domestically in the American Southwest, I noticed a change in my shooting style. With wildlife trips I used to shoot between 500 and 1000 raw images per day, and I was noticing that I was only shooting a few hundred at the most. My visual style was also changing to give preference to the bigger picture types of images where a subject, like an animal, played a smaller role in the overall composition. I have used this style in the past, however I would shy away from them due to how small I could make the reproductions. This style works well with larger print sizes, say from 20x30” and larger.
This style started to represent more and more of my captures, with the ‘fill the frame’ style taking a back seat. What I mean by ‘fill the frame’ is the style where the subject consumes a large portion of the frame, often with part of the subject leaving the frame. These types of shots typically require 400mm, 500mm and 600mm lenses, often with teleconverters. I do like those types of images, however may of my images in the past were of this style and it limited my ability to fully tell a story about African wildlife in their environment.
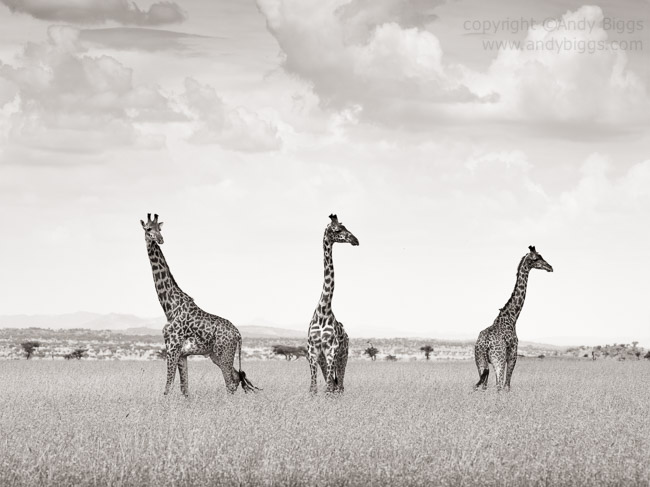
Three Giraffes
Grumeti Reserves, greater Serengeti ecosystem, Tanzania
Phase One DF+, IQ160 60mp digital back, Schneider 240mm lens
The Switch
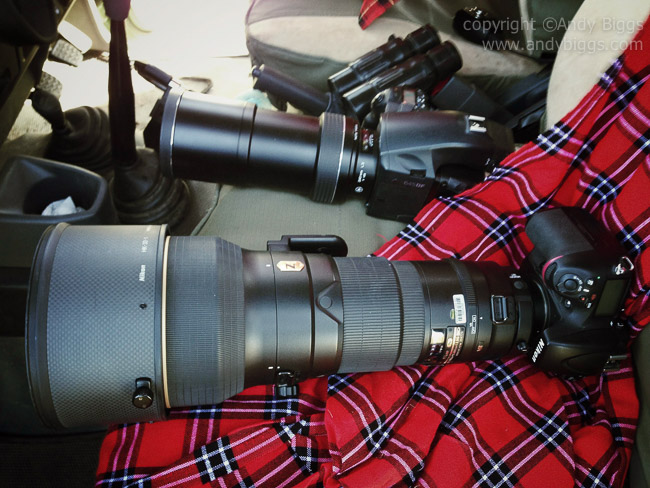
In August 2012 I adopted a new Phase One digital medium format system for my wildlife and landscape photography. Since this is most of my photography, other than general travel and family photographs, I skewed my needs in favor of wildlife and landscape needs. Here is what I currently have in my bag:
- Phase One DF+ camera
- IQ280 80 megapixel digital back
- 28mm
- 45mm
- 80mm
- 75-150mm
- Schneider 240mm
I took this equipment on safari with me to Botswana the following month and I learned much about the system’s huge benefits, drawbacks and ‘learning opportunities’.
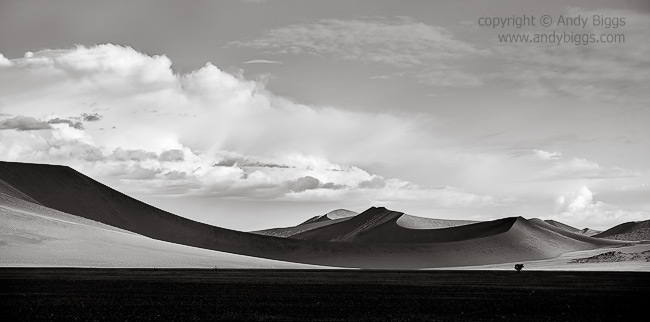
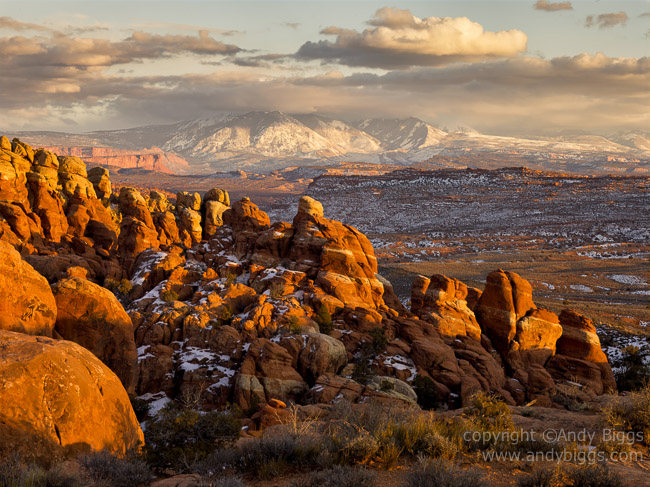
Sossusvlei, Namibia
Phase One DF+, IQ280 80mp digital back, 75-150mm lens
Autofocus
Let me get one thing straight from the beginning: medium format will never meet the expectations of those who are looking for 35mm-like autofocus performance. It won’t happen. My style of wildlife photography doesn’t always need fast or even accurate autofocus. I am after images that conform to my adjective-driven approach to photography, which means I have a list of adjectives I shoot for and this is my primary driver when I take the shutter. A typical list of adjectives for me is: timeless, remote, regal, hopeful, uplifting. This approach means that action (or inaction), color, subject, location are all secondary and are used only to support those adjectives. You can read more about this approach in an upcoming issue of Outdoor Photographer Magazine if you are interested in learning more.
In support of these adjectives it means I am often finding subjects standing, lying down or engaged in play. I rarely find those adjectives with aggressive or fast-moving scenes, and as such super fast autofocus isn’t a huge need for me. Yes, it’s awesome to have but I am realistic about what my needs are. When it comes to autofocus accuracy, I am typically stopping down to f/8 or f/11 just in case my autofocus accuracy isn’t quite perfect. Call it insurance, just in case I miss.
With my landscape photography I usually don’t use any autofocus at all and just watch the screen to see what is in focus. If I do use autofocus it is only a quick way to get somewhat close to what I want. I have configured the DF+ camera body to reassign the autofocus functionality to a button that can be pressed with my thumb, similar to I have shot with 35mm cameras. This is a best practice for me, and anyone who travels with me on safari will know that I am a big fan of separating autofocus from taking a shot. That’s a topic for another blog post (I have many of these ideas that rarely make it to this blog).
Ovahimba
Hartmann Valley, Namibia, along the border with Angola
Phase One DF, IQ160 60mp digital back, 80mm lens, hand-held
ISO Performance
The native ISO sensitivity setting on my IQ280 digital back is a value of 35. This works perfectly ok for my landscape trips, however that isn’t enough for wildlife photography for most situations. I have found that I can shoot at ISO 35, 50, 100 and even 200 for my wildlife photography needs. 200 is limiting, however let’s separate out a few things to illustrate my feelings on this. First there is noise. I don’t object to some noise in my digital files. I don’t find that it is that big of a deal, as when I am printing large prints (24 inches or larger on the short dimension) some noise helps fill in between the cracks if there is much enlargement from the native file size. I know this sounds crazy. Remember I am coming from the 35mm world where I would have to get crafty to arrive at a large print size and I would often add some stochastic noise in Photoshop after the digital enlargement and before I sent the print job to the printer. This helped mask some of the nastiness of the enlargement. So this doesn’t bug me at all. What I don’t like is the opposite side of the coin, which is the reduced dynamic range. My biggest desire for my printed images is to have gobs of detail and a dynamic range from black to white that has so many subtle transitions in between. I want something that reminds me of an Ansel Adams print, which to my eyes are among the best-printed photographs I have ever seen. So as the ISO value increases you end up with more noise and less dynamic range. I can live with one (noise, to a point) and the other I really don’t want to give up. Such is the life of compromises.
The Phase One digital backs that I have used have all included their Sensor+ technology, which means it combines 4 pixels into one for a better noise and dynamic range, at the expense of file size. I prefer to not use this technology, as my 80mp file suddenly becomes 20mp. It is great to use in a pinch, though, and sometimes I will try a shot at ISO 200 in the full 80mp file size and another shot at ISO 800 or 1600 at 20mp. This is for wildlife photography only, as I am always shooting at ISO 35 or 50 for landscapes when I am using a tripod to support the camera. For wildlife I am typically using a beanbag, and shutter speed is the one thing I have to pay the most attention to. I am finding that I can often get acceptably sharp images if I shoot at 1/125 or higher, and some of my success have happened at 1/30 and 1/60 if all of the stars align: no wind, subject isn’t moving and I haven’t had much coffee.
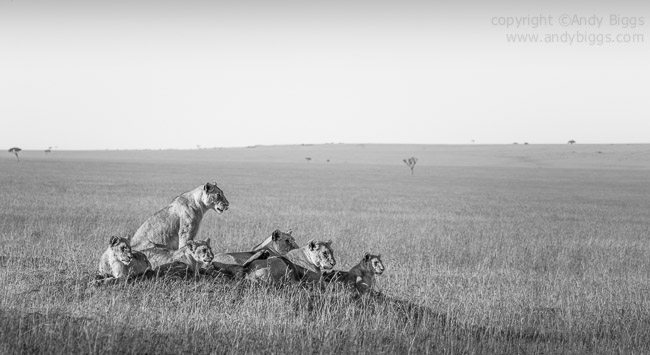
The Marsh Pride
Masai Mara Game Reserve, Kenya
Phase One DF+, IQ160 60mp digital back, Schneider 240mm lens
Battery Life
My camera system uses two different batteries: one for the camera and one for the digital back. In some ways this is a drawback and in some ways it is a benefit, depending on your own uses. Since the digital back is removable from the camera body, you can attach the digital back to a technical camera and the back has its own power source. I will talk about the technical camera option in a minute.
The battery life of the camera is more than I have ever fully exercised. The DF+ camera can use either a set of AA batteries or a single lithium battery that can be recharged. I travel with the single lithium battery, as well as a set of rechargeable AA batteries and a small battery charger. I love having different ways of powering the camera, just in case one option is dead.
The battery for the IQ280 digital back lasts about much of the day for me in average temperature conditions. I have 4 batteries for the digital back, and I rarely need more than 2 to get me through a day. The only time I have needed more than 2 has been on a trip to Iceland in the winter when the temperature was just above freezing. When I turn on the IQ280 I just leave it on until the battery runs out. The system has a tremendous amount of engineering in the area of power management, and when the back isn’t in use it powers down much of the subsystems as to save power.
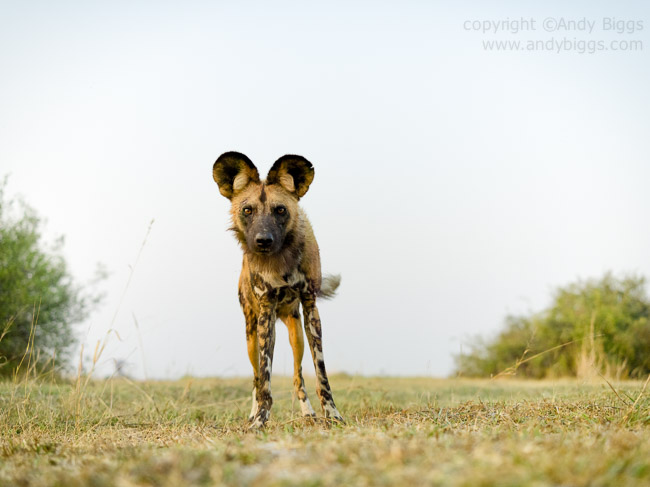
African Wild Dog (Lycaon Pictus)
Okavango Delta, Botswana
Phase One DF, IQ160 60mp digital back, 75-150mm lens, hand-held
Frames Per Second
This is a short topic. I don’t even want to look at the specs with regards to how many frames per second I can shoot. It wouldn’t surprise me if it is less than 1 per second. It doesn’t matter at all to me, as my style of shooting is more about clicking when the moment is right and not spraying and praying. I do miss shots from time to time, but I am ok with this as the resulting file size is completely worth it. Note: these files are roughly 10,300 pixels on the larger side. By comparison Nikon D800 (36mp) files are roughly 7,200 pixels on the longest dimension.
One System? Two Systems?
Have I turned my back on 35mm? Not really. I recognize all formats have their strengths and weaknesses. My pursuit of highly detailed large prints means that I am giving up some functionality (higher ISO’s, higher frame rate, longer lenses, more specialty lenses) and I will likely continue to shoot with 35mm for those situations when digital medium format isn’t appropriate. For example, mountain gorillas, chimpanzees, fast action, avian subjects and when I need to freeze action at higher ISO’s. Earlier in 2014 I sold off all of my Nikon 35mm camera gear and I rely on borrowlenses.com to fill in the gap on a trip-by-trip basis. Heck, I may rent a Canon camera and a long lens for one trip, then a Nikon camera and a Nikon long lens for the next and then maybe a Panasonic GH4 system if I need something small that can also shoot 4k video. I have complete flexibility to do what I want this way and it is very liberating. Maybe this is something I should elaborate more on for a future blog post……
I haven’t noticed that my bag weighs any more with medium format than it did with 35mm, however maybe this is due to my not carrying around a huge wildlife lens. My longest medium format lens is the Schneider 240mm, which is equivalent to about 155mm on a full frame 35mm camera.
A Great Wildlife Combination?
Phase One system + Nikon 35mm system
My next trip to Africa will be a pair of safaris: chimpanzees and mountain gorillas, followed by a trip to the Masai Mara for the great wildebeest migration. I plan on taking a combination of Phase One gear with a Canon dSLR and 2 lenses (70-200mm f/2.8 and a 400mm f/2.8). The complicating thing for me is when I am in the Masai Mara I am driving my own vehicle and I have limited space to place my camera gear while on game drives. I will likely have my Gura Gear Bataflae 32L, and on one side of the bag will be my Phase One DF+ camera, IQ280 digital back with the Schneider 240mm, and on the other side I will have a 1Dx mated to a 400mm f/2.8. The 70-200mm will only be used for the primates portion of my trip and in the Masai Mara for low light situations when my Phase One system cannot be used.
Technical Cameras
Since the Phase One digital backs can be used either on a camera body like the DF+ or on a technical camera, this needs to be talked about. If I only shot landscapes, it is entirely possible that I would only be using a technical camera for the digital back. Technical cameras have many many merits, including but not limited to: camera movements such as tilt / shift / rise / fall, less vibration from the shutter, no large mirror that creates vibration, better optics and a system that can be smaller and lighter.
I have borrowed an Alpa technical camera on a few occasions and have loved the system. The camera was compact, the optics top of the notch and results were second to none. Again, if I were a dedicated landscape photographer this is the system I would likely own. What is preventing me from owning a second system is purely based on cost and how often I would use it. Many of my trips are landscape / wildlife combinations, and I prefer to use the DF+ SLR camera and lenses.
The Fiery Fournace
Arches National Park, Utah
Phase One IQ160 60mp digital back, Alpa STC camera, Schneider 120mm lens
Large Prints
This subject needed to be address last, as this is what has been the primary driver: the ability to print very large prints with detail and a dynamic range that keeps a viewer locked onto a print with a long attention span. Many of my prints are sold through interior designers, and they are often asking me for large prints for commercial spaces in office buildings, hospitals and other public spaces. Many of these prints are 20x30, 24x36 or 30x40 inches.
Let’s compare the native resolution of a print at 300ppi between the two cameras on the market that I have used for the past few years:
Nikon D800 = 16x24 inches
Phase One IQ280 = 26x34 inches
and all other 12mp, 16mp, 18mp, 21mp, 22mp and 24mp cameras will print smaller than 16x24. Yes, some images work well up to 20x30” or even 24x36”, however I want *all* of image images to be able to print well at sizes up to 30x40 or 30x45”. Call me silly, but I am a stickler when it comes to print quality.
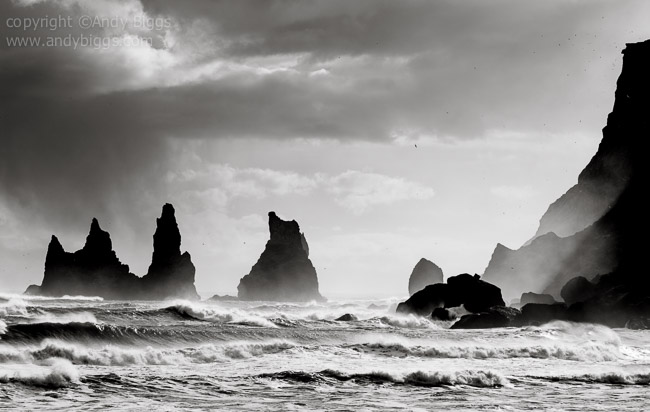
Reysnisdrangar, Iceland
Phase One DF+, IQ280 80mp digital back, Schneider 240mm lens
Wrapping It All Up / Conclusion
My 80mp system reaches my goals of the adjective driven approach to photography that can also be printed at any size I could ever imagine. Over the past 18 months I have found myself coming back from my overseas travels with an eagerness to get to my office / studio to process and print some of these files at 30x40” just to see how they look. These prints remind me of when I was learning how to print in the darkroom, watching in awe, as a print would come to life in front of my eyes. I feel that same sense of excitement when I see these prints coming off my wide format Canon printer. The immense sense of accomplishment and pride that I feel makes all of the effort worthwhile.
Additional Images

Iceland Basalt Stacks
Phase One DF, IQ160 60mp digtal back, 45mm lens
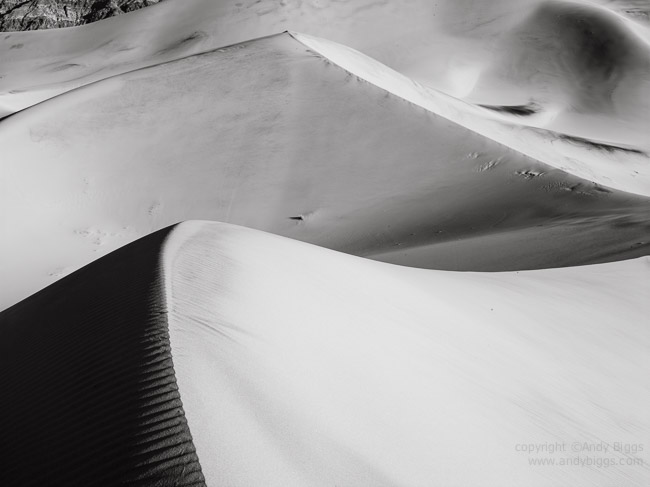
Eureka Dunes, Death Valley National Park
Phase One DF, IQ160 60mp digital back, 75-150mm lens
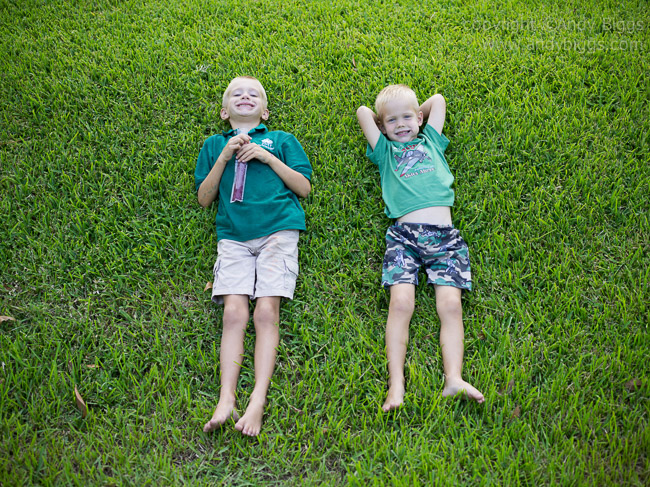
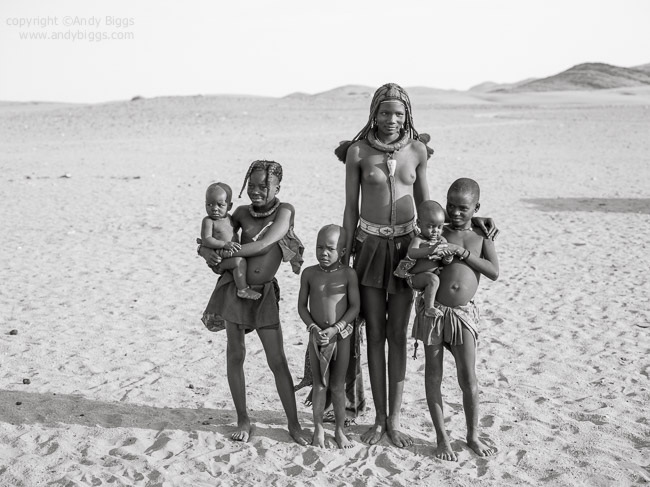
My Kids
Phase One DF, IQ160 60mp digital back, 80mm lens, hand-held
Sea Lion
Galápagos Islands
Phase One DF+, IQ280 80mp digital back, 75-150mm lens, hand-held


 News,
News,