Adobe Lightroom 3 is 50% off at $149 at Amazon.com
 Sunday, November 13, 2011 at 09:40PM
Well, the sales keep coming in. Adobe now has Lighroom on sale for $149, which is 50% off. Talk about a stupendous deal.
I am an avid adventurer, conservationist, teacher, and outdoor photographer whose photography celebrates the African landscape and its rich wildlife, people, and culture. My photographic safaris allow my travelers to not only enhance their understanding of photography, lighting, and wildlife, but to develop a life-long admiration for Africa ‘s beauty and culture.
Banana Republic recently used my photographs as the cornerstone of their Urban Safari campaign, and my images were seen in all 750 stores around the globe, as well as in their billboards, catalogs and annual report. I was also the winner of the BBC Wildlife Photographer of the Year in the ‘Wild Places’ category in 2008 and a highly commended in the ‘Creative Visions of Nature’ category in 2007.
I launched Gura Gear in 2008, in an attempt to deliver lightweight camera bags to the market. I was looking for a lightweight camera bag to hold all of my photographic gear, and there was nothing desirable on the market that suited my needs. After spending 2 years with many prototypes, the Gura Gear Kiboko bag was born. More products are now available on the Gura Gear web site.
 Sunday, November 13, 2011 at 09:40PM
Well, the sales keep coming in. Adobe now has Lighroom on sale for $149, which is 50% off. Talk about a stupendous deal.
 Tuesday, October 25, 2011 at 10:24AM

Elephant Family in the Okavango Delta. July 2011
Nikon D3, 28-300mm f/3.4-5.6, 1/2000 @ f/5.6, ISO 1250
 Monday, October 24, 2011 at 11:20AM
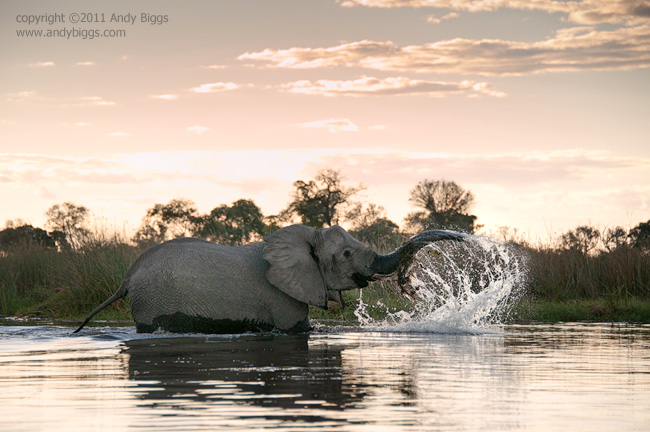
Elephant in the Savute Channel
Linyanti Concession, near Savuti Camp, Botswana. July 2011
Nikon D3x, 28-300mm, 1/2000 @ f/5.6, ISO 800. Processed in Adobe Lightroom and Nik Viveza 2
This was a very tricky image to process, I must say. I was shooting with my Nikon D3x that afternoon, and the camera isn’t well known for its high ISO capabilities. I needed to keep the ISO down, possibly 1600 or lower, but the main challenge was trying to balance blowing out the details in the sky with the deep shadows of my subject. I could only minimally process this image in Lightroom, and the bulk of the work was done in Nik Software’s Viveza 2. In Lightroom I only adjusted the white balance, exposure, black point and a small gradient on the sky. I brought the image into Photoshop as a smart object, which allowed me to go back to the original raw file to tweak some of those settings. In Viveza 2 I worked on tonal relationships, and the main thing I needed to work on was the exposure on the elephant. There was simply no way of getting detail in the sky with enough exposure on the elephant, at least from a global processing point of view. Viveza saves the day.
Tip: If you are interested in learning more about Nik Software’s tools, you can use my code ABIGGS during checkout for a 15% discount. www.niksoftware.com
 Botswana,
  Elephant,
  Savuti,
  africa in
  Photo of the Day
  Tuesday, October 18, 2011 at 10:18AM
You spoke and we listened. You asked for a smaller Kiboko bag. We made it. You wanted a place to put a laptop computer. We added it. You wanted a removable waist belt. You got it. You want to travel to places across the globe with less stress. You wanted a beefed up harness system that would be comfortable for longer hikes. We heard you loud and clear. Here it is, the new Gura Gear Kiboko 22L+.
Before I go into product details, I want to tell you that I and the rest of the Gura Gear team have been working hard at delivering your needs and desires, and this isn’t the last product you will see from us. Our design philosophy is to make products that we want to use ourselves, and after many many trips around the globe with 22L+ prototypes, I think we nailed it. I hope you think so, as well.
Kiboko 22L+ details
The Kiboko 22L+ was designed from the blueprints that our customers provided over the last couple of years while working out on Safari, touring southeast Asia, or simply shooting at home. Much like its more mature sibling, the Kiboko 22L+ is lightweight and durable, but this bag has a thing or two to teach big brother; like how to carry up to a 15” laptop computer. Sized to fit the most stringent of international carry on requirements without sacrificing carrying capacity; this gem can carry up to a 500mm f4.0 lens in style. The Kiboko 22L+ was made to travel with a beefed up harness system that features memory-foam shoulder straps, a vented and padded back panel, a removable waistbelt and shoulder straps that can tuck away when not needed.
While remaining true to the Kiboko DNA, the 22L+ features a unique butterfly flap access system which allows you to easily get to multiple bodies, lenses, and all your photo accessories without exposing all your prized gear. Kiboko backpacks are made of high-tech materials designed to balance weight and durability. Used by some of the fastest sail boats in the world, VX-21 has a superior strength to weight ratio while remaining abrasion- and tear-resistant. VX-21 is expensive, but your gear is worth it.
Highlights
Kiboko 22L+ front view
Kiboko 22L+ rear view. The waist belt is removable!
Kiboko 22L+ rear view with harness system hidden away
Kiboko 22L+ accommodates up to a 15” laptpop computer
Kiboko 22L+ with my configuration from my last trip. Gear, from top left to bottom right: 85mm f/1.4, 24-70mm f/2.8, 28-300mm f/2.8, 16-35mm f/4, Nikon D3s, Nikon D3x
Kiboko 22L+ with my 200-400mm f/4 on the other side. The 22L+ can accommodate up to a 500mm f/4 lens.
22L+ is easy to shoot out of, just like the bigger 30L brother.
The all-new Kiboko 22L+ is lightweight at only 3 lbs 15 ounces, yet allows for easy travel
Discover your next object of desire, the new Gura Gear Kiboko 22L+
 Bag,
Bag,  Camera,
  Gura Gear,
  Kiboko 22L+,
  Lightweight in
  Gura Gear,
  News
News  Wednesday, October 12, 2011 at 02:14PM
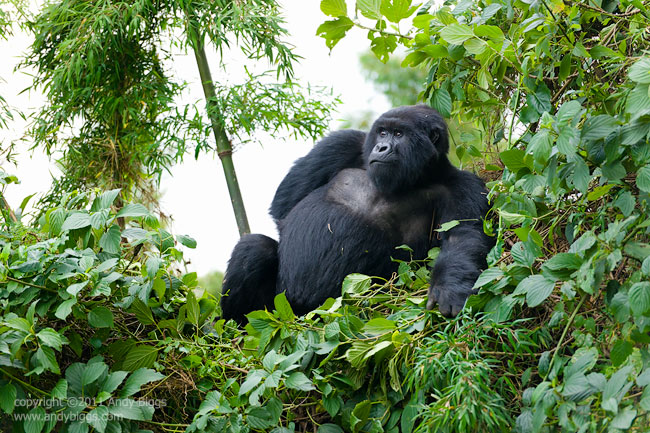
Guhonda the Silverback
Parc National des Volcans, Rwanda. September 2011
Nikon D3x, 70-200mm f/2.8, 1/1000 @ f/3.5, ISO 800
I am back from and amazing 3+ weeks out on safari in the African countries of Rwanda and Kenya, and I thought I would put down some words to describe the trip. My trip was broken into two distinct safaris:
Safari #1: Mountain Gorillas in Rwanda and Kenya’s Masai Mara ecosystem on private concession
Locations: Sabyinyo Silverback Lodge, Rwanda and Mara Plains Camp, Olare Orok Conservancy (just outside of the Masai Mara Game Reserve)
Safari #2: Masai Mara migration
Locations: Mara Explorer Camp, Governors’ Main Camp
Photographic Equipment
Lenses: Nikon 24-70mm f/2.8, 70-200mm f/2.8 VRII, 200-400mm f/4 VR
Camera Bags: Gura Gear Kiboko 22L+ bag, Gura Gear Chobe shoulder bag
Ok, let’s dive into my first safari’s summary: it was absolutely awesome. We stayed at Sabyinyo Silverback Lodge, and cannot say enough good things about the staff, food, accommodations and overall feel. We went on 3 gorilla treks; some were easy and a few were not so easy. If you are thinking of joining a trek someday, please be prepared to move your legs on slippery and steep earth for 2 to 6 hours. Each day’s hike centered around a different family group of gorillas, and each experience was totally different than the others.
Photographically I used a Nikon D3 and D3x as my camera bodies, and 24-70mm and 70-200mm lenses. Nearly all of my shots were taken at either ISO 800 or ISO 1600, and all were shot between f/2.8 and f/5.6. Most shots were near f/4.0, as I was trying to walk a tight balance between depth of field and minimum shutter speed. Depth of field is definitely an issue, as at f/2.8 on a 70-200mm (at most focal lengths) isn’t enough to have both eyes sharp at a distance of 10 to 20 feet. Technically we had to stay at least 7 meters away from our subjects, however they are active and move around quite a bit, and you never know how close they will come to you.
After our time in Rwanda, we flew back to Kenya and stayed the night at the historic Norfolk Hotel.
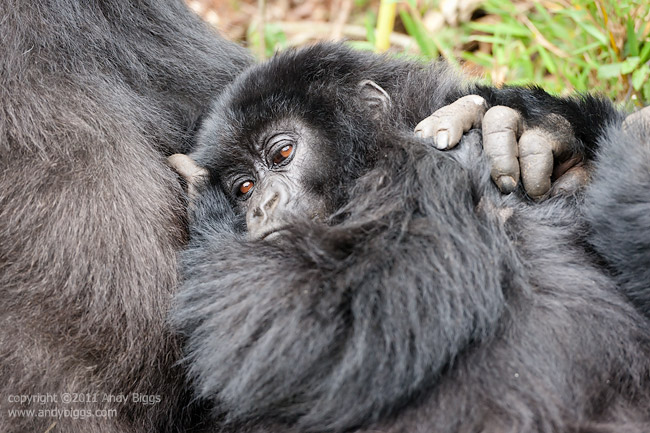
Baby Mountain Gorilla
Parc National des Volcans, Rwanda. September 2011
Nikon D3x, 70-200mm f/2.8 VR, 1/320 @ f/5, ISO 1600
The next morning we flew out to the Masai Mara where we were met by our guides from Mara Plains Camp. We loaded up into the vehicles, headed towards camp and enjoyed some great wildlife viewing along the way. Our safari group stayed at Mara Plains Camp for 6 nights, and it was great to spend so much time in only one location. The Mara Plains Camp managers are Richard and Lorna, and they made us feel at home during our stay. Our guides were all locals Maasai from the surrounding area, and many of them actually grew up on the Olare Orok Conservancy, which is where the camp and game drives centered around.
The wildlife, experiences and weather were all extraordinary during our stay, as we had more big cat sightings than I could count. Numerous lion prides are on the conservancy, and we never went a game drive without quality sightings of them. We also had leopard sightings on most game drives, as well as cheetah. The cheetah sightings were all top notch, and the benefit of being in the Olare Orok Conservancy is that were are allowed to drive off-road. The ability to set up our shooting angle and location are a huge benefit for photographers, and enough cannot be said about this benefit. There are only 3 camps on the Olare Orok, and Mara Plains Camp is my choice of the 3 for many reason: guides, accommodations, camp staff and proximity to the Masai Mara Game Reserve. Mara Plains Camp only has 7 tents, and my safari group completely took over the camp during our stay. We actually brought our own wine for our Kenya portion of the safari, and that certainly made for smiles on faces. The wine was compliments of Vines of Mendoza’s founder, Michael Evans. Thanks, Michael!
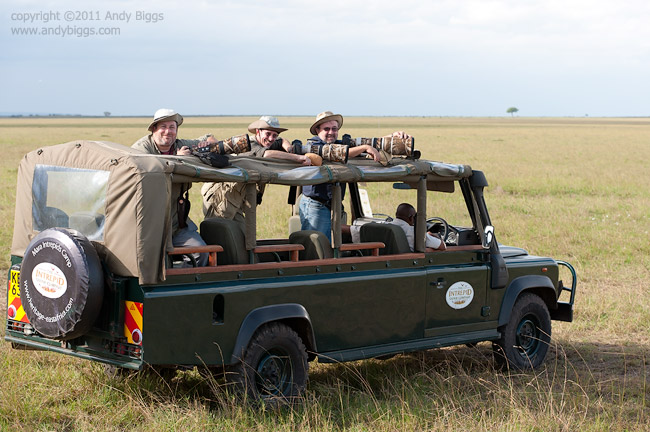
3 Happy Safarigoers
At the end of my time at Mara Plains, I said goodbye to my safari group and welcomed another. This all happened at the airstrip within a 5 minute period, so there was no rest for the weary. My second safari was designed to be both a small and intimate safari, as well as it was centered around the wildebeest migration.
We started off our safari by checking in at Mara Explorer, which is related to Mara Intrepids, but much smaller and intimate. We spent the next 4 nights at Mara Explorer, and used our time there to run our game drives on the eastern side of the reserve, north of the Talek River. Our game sightings were all excellent, with good general game, big cats, rhino, birds of prey and all paid off photographically. I don’t think we ever had a game drive that didn’t produce something that made me or my travelers happy.
We finished up our safari at Governors’ Main Camp, which is in a different area of the Masai Mara, and this allowed us to spend more time along the Mara River in the hopes of photographing a river crossing of wildebeest or zebras. For some of us in the group the time spent along the Mara River really paid off with a great crossing or two. This really made me happy, as this is what they had come for. Again, amazing sightings all around, especially for lions.
This is a very brief summary from a wildlife perspective, because it is so difficult to chronicle all of the subjects we saw each and every day for all of my 3 weeks in Africa. Let’s talk about a little bit of gear for a few moments.
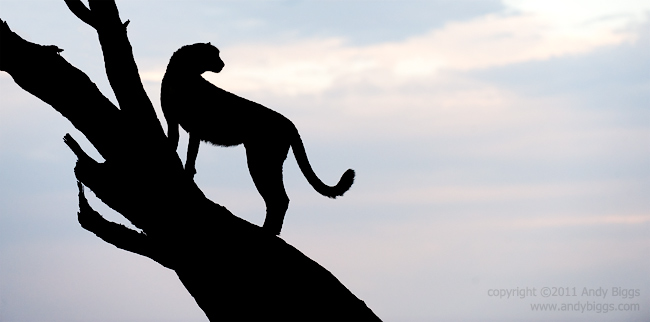
Cheetah on a Tree
Masai Mara Game Reserve, Kenya. September 2011
Nikon D3, 200-400mm f/4 VR, 1/500 @ f/4.5, ISO 800
What Worked and What Didn’t
I switched over the Nikon in early 2009, and I am still quite happy with the gear that I own. The D3 is getting a little long in the tooth, but it is still a great performer in the low light territory. Yes, it is only 12mp, but those files that come off are just gorgeous. I do need low light for at least 60 minutes of shooting each day, and I wouldn’t want to go on safari with a camera that didn’t perform well at ISO1600 or even 3200. You really do need that kind of low light needs from your digital camera.
My other main camera is a Nikon D3x, which I prefer to use whenever I don’t need ISO1600 or higher. Yes, I do use the D3x up to 1600, but rarely beyond that. My preference is to keep it to ISO800 or below, as that is where this camera really shines. The D3x has pixels to burn, but I don’t like to crop my images if I can help it. My print sales business really does benefit when I can sell 40x60” canvas prints to the interior designers out there, so I do everything in my power to enable those print sales. Some of my prints are 20x30” or perhaps 12x18”, but the bulk of my sales are large canvases. I do swap my D3 and D3x cameras between my 70-200mm and 200-400mm lenses, depending on what I need at that time. For my Botswana safaris I use my 70-200mm 50% of the time, and when I am in Kenya or Tanzania I probably use it around 25% of the time. The primary reason is how close we are to our subjects, and in east Africa we tend to be farther away from them.
My third camera was a Nikon D7000, and I brought the camera to be used primarily as a video camera. My video needs are fairly simple: I use video for marketing purposes on my web site. Most of the video that I shoot is of camp interiors, so my potential customers can understand what level of luxury or comfort they can expect. I have to be honest that when I did shoot still with the D7000 I wasn’t overly impressed with the autofocus capabilities. The AF accuracy wasn’t what I am used to with the pro level cameras, unfortunately. The image quality was also disappointing, even at lower ISO values. There is something very soft to the images, and I don’t know how else to describe it. It isn’t my preference, for sure, and I have relegated the D7000 to video or grab shots only. I did purchase the portrait grip for the D7000, and was largely happy with it, however I do wish I could put a D3/D3x battery in it like I could with the D700/D300/D300s portrait grip. This would be a huge benefit.
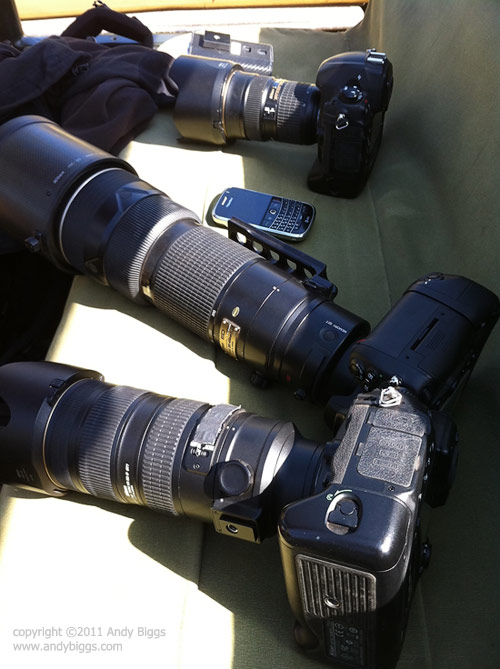
My Gear for all to see. Notice that I use gaffer tape over my VR buttons to keep them from switching off. It is a problem when shooting on beanbags to have the VR switch go off without your knowledge. Not good.
I did take all Gura Gear camera bags with me (surprise surprise), and they worked out perfectly. My main bag was the new Gura Gear Kiboko 22L+, and I carried the following gear inside:
The new Kiboko 22L+ is our newest bag on the block, and will formally be announced soon. Very soon. Our original Kiboko bag was updated recently, and is 30 liters in volume. Our newest bag can be best described as it’s smaller brother at 22 liters, but not smaller in features. We actually put our pencils to napkins (beer coasters included) on this one and outdid ourselves by making a bag that accommodates our original principles of being lightweight, made out of the best materials, allows for easy transportation and easy field-use and is airline compatible for overhead compartments. We beefed up the shoulder straps, make the 30L smaller and also added in a compartment for a laptop computer. Ta-da! Yup, you asked and we delivered.
My other Gura Gear bag was the new Chobe shoulder bag. The Chobe carried:

iPhone shot of two Gura Gear Chobe bags
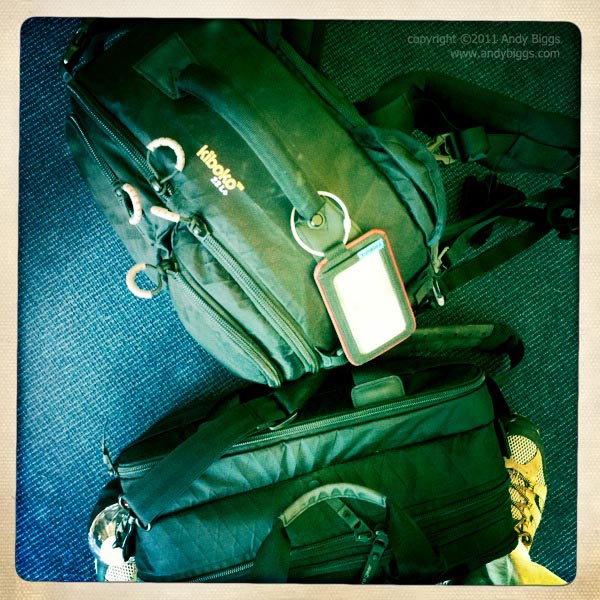
The Yet-To-Be-Announced Gura Gear Kiboko 22L+ and the Chobe 19-24L. (Yes, I must be hip because I am using Instagram and Hipstamatic more and more on my iPhone)
The Chobe is a great travel companion to the Kiboko line of camera bags, but it can also be used as a camera bag itself. The bag is 19 liters in volume, and it can be enlarged to 24 liters by unzipping an expansion zipper in the middle of the bag. There is a padded insert that converts the Chobe 19-24L into a bag that can carry many different configurations of cameras and lenses, and it is a popular option for those users who may not be traveling with a Kiboko. In other words, great for people on business trips, portrait photographers or wedding photographers. As an aside note, the Chobe bag can easily carry my Nikon 200-400mm f/4, which means that I can always offload my big lens to from my main Kiboko bag to the Chobe during checking into an airline, as this can help get my weight down even lower on my main carryon bag. Tip: airliness rarely, if ever, weigh your ‘personal item’, so shifting weight around between your main bag and your personal item can be an ace in the hole.
As far as what didn’t work on this trip I have to say that not much disappointed me. The D7000 didn’t turn out to be what I had hoped it to be, but other than that I was happy with everything else.
Summary of my Safari Summary
I was away for more than 23 days, which is one of my longer trips away from home. I came home with more than 8300 raw files, and I haven’t found much time to whittle them down to my favorites as of the writing of this blog entry. The Rwanda mountain gorilla experience was one that I will never forget, and I eagerly await my next visit when I will be back there in August 2013 (trip is being planned right now). My 14 nights in the Masai Mara made for some very happy travelers, and Kenya is back on my list for places to operate my higher end safaris. Why? Because the combination of off-road driving, wide open savannah plains and quantity of wildlife all add up to a rich safari experience for photography.
 Gorilla,
  Kenya,
  Mara Plains Camp,
  Migration,
  Rwanda,
  Sabyinyo,
  Wildebeest in
  Safari Reports
  Tuesday, October 11, 2011 at 03:26PM
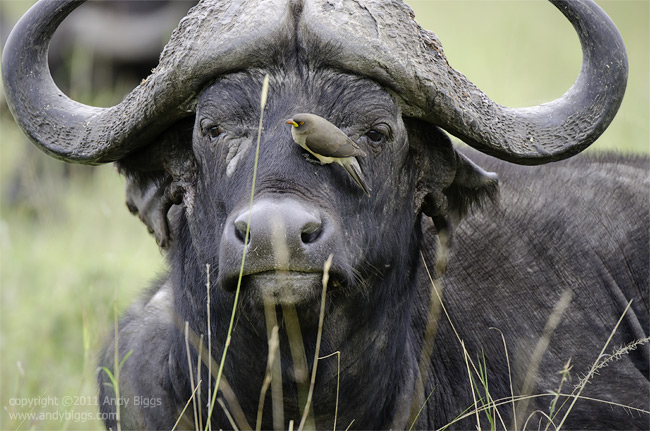
Cape Buffalo and Oxpecker
Nikon D7000, 200-400mm f/4 VR, 1/320 @ f/5.6, ISO 800
 Cape Buffalo,
  Kenya,
  Masai Mara,
  Oxpecker,
  africa in
  Photo of the Day
  Tuesday, October 4, 2011 at 02:36PM
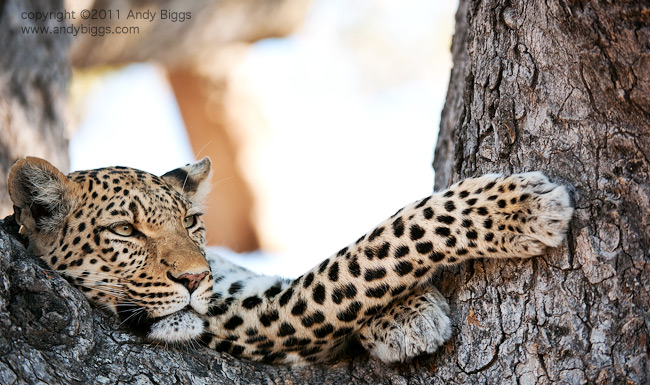
Legadema
Mombo Camp, Botswana. July 2011
Nikon D3x, 200-400mm f/4 VR, 1/640 @ f/4, ISO 800
 Botswana,
  Legadema,
  Mombo,
  Okavango Delta in
  Photo of the Day
  Thursday, September 29, 2011 at 02:07PM
The Thomson Safaris 2012-2013 catalog is out and available. Yours truly has the cover this year, which is photo of a female leopard who is relaxing after a rather sumptuous meal (impala). Yum Yum. If you are interested in joining me on a Tanzania photo safari or to any of my other destinations in Africa, my Africa photo safari schedule can be found on my main web site at andybiggs.com.
 Photo Safari,
  Tanzania,
  Thomson Safaris,
  africa in
  Safaris