Social Networks and RSS Feeds
Instagram Instagram
About Andy


I am an avid adventurer, conservationist, teacher, and outdoor photographer whose photography celebrates the African landscape and its rich wildlife, people, and culture. My photographic safaris allow my travelers to not only enhance their understanding of photography, lighting, and wildlife, but to develop a life-long admiration for Africa ‘s beauty and culture.

Banana Republic recently used my photographs as the cornerstone of their Urban Safari campaign, and my images were seen in all 750 stores around the globe, as well as in their billboards, catalogs and annual report. I was also the winner of the BBC Wildlife Photographer of the Year in the ‘Wild Places’ category in 2008 and a highly commended in the ‘Creative Visions of Nature’ category in 2007.

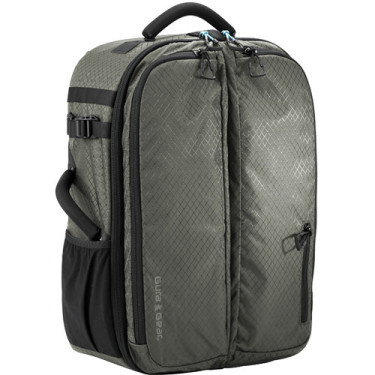
I launched Gura Gear in 2008, in an attempt to deliver lightweight camera bags to the market. I was looking for a lightweight camera bag to hold all of my photographic gear, and there was nothing desirable on the market that suited my needs. After spending 2 years with many prototypes, the Gura Gear Kiboko bag was born. More products are now available on the Gura Gear web site.


Search
Friends

Entries in Gura Gear (12)

Wednesday
Mar022016

On the Lookout for the Classic Gura Gear Camera Bags?


I have had many emails asking me if Gura Gear still has the line of bags in stock that had the old branding on them, and the short answer is the best way to find them is to look over at one of the dealers, Outdoor Photo Gear. As you may know, the name Gura Gear was discontinued last year in order to focus time and effort on our Tamrac brand.

Here are some helpful links:

Gura Gear Bataflae 32L - $329 (was $429)

Gura Gear Bataflae 26L in stone color - $199 (was $379)

Gura Gear Bataflae 26L in black - $199 (was $379)

Gura Gear Bataflae 18L in tan - $149 (was $299)

Gura Gear Bataflae 18L in grey - $149 (was $299)

All of the Gura Gear products can be found by searching on Gura Gear on their web site. And, of course, you can find all of the new bags over on the Tamrac web site.

Wednesday
Jun252014

Court Approves The Sale of Tamrac Brand and Assets to Gura Gear


COURT APPROVES THE SALE OF TAMRAC BRAND AND ASSETS TO GURA GEAR

OGDEN, UT (June 18, 2014) – GuraGear, LLC, makers of innovative carrying solutions for discerning creative professionals has agreed to acquire the brand and assets of Tamrac, Inc. The U.S. Bankruptcy Court approved the sale through the Chapter 11, Section 363 Sale of Assets process. Tamrac entered Chapter 11 bankruptcy protection in early 2014 and has a 37 year history of developing affordable carrying solutions for photographers.

Gura Gear President, Gregory Schern stated, “this acquisition represents an exciting opportunity for Gura Gear to build upon a brand with a legacy of designing solutions for photographers and a dedicated customer following while leveraging worldwide distribution. We look forward to providing customers a high level of service and implementing solutions from a new perspective in a rapidly evolving industry.”

Tamrac, Inc. will continue to operate normally until the acquisition is finalized in late June. Once the transaction is complete, Gura Gear will relocate Tamrac’s assets and expand its Ogden, Utah facilities.

Questions regarding the acquisition can be directed to info@guragear.com.

About Gura Gear

Gura Gear began in 2008 as an idea on the back of a napkin by a team of passionate photographers looking for the perfect photography bag. Today, Gura Gear has expanded to a full line of carrying solutions built to the highest standards utilizing only the best materials and workmanship. Gura Gear focuses on creating innovative products for discerning creative professional and enthusiast photographers who love to explore the world.

About Tamrac

Since 1977, Tamrac has offered a diverse product line to meet a wide range of travel and photographic requirements. From the first bag a beginning enthusiast will purchase to a bag suitable for the professional, Tamrac is committed to continuing to offer innovative products that are easy-to-use and understand.

Saturday
Jul062013

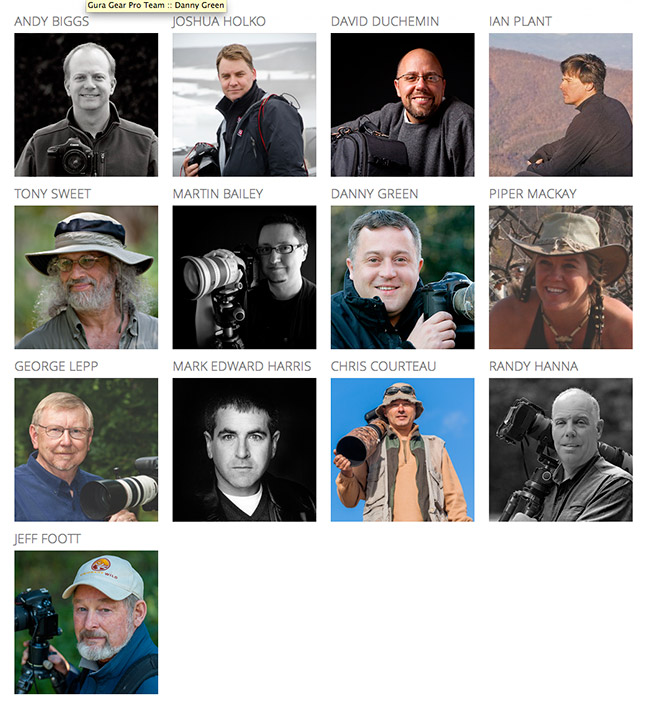
Gura Gear Pro Team

When I launched Gura Gear way back in 2008 I was hoping to sell a few dozen camera bags per month. Well, that was a long time ago and before Gura Gear had any customers. Gura Gear now has thousands of happy customers, and along with those customers are some working photographers who have come to rely on Gura Gear and all that the company stands for: durable, lightweight and well built camera bags for the traveling photographer. Gura Gear has recently announced the Pro Team, and you will recognize some names on the list!


Tuesday
Jun182013

Gura Gear Around The World: The Monarch Bataflae

I just got back from a superb triplet of safaris in east Africa, where I took our Gura Gear Monarch Bataflae on its maiden voyage. So what is the Monarch Bataflae you ask? The Monarch Bataflae is a Gura Gear 32L Bataflae camera bag, in grey, and it will be traveling around the world with different photographers as hosts. Since its inception, Gura Gear has focused its efforts on photography backpacks for the traveling photographer. The original bag featured a butterfly style opening. After many phases of design, the bag has evolved into what is now the Bataflae. The 26 and 32 liter Bataflae bags still retain the same butterfly style opening capability.

I had the Monarch Bataflae for 4 weeks in Africa, and it is heading to some new locations with Joshua Holko next. We want your help to get the bag to as many places in the world as possible. (Applications are now open! Click here to apply.) We will open up applications for anyone who wants to take the bag on a trip to wherever it is you go! You will also be able to sign your name inside the bag next to the pros you’ve always looked up to.

During my travels with the Monarch Bataflae, I carried the following gear inside:


  • Nikon D800
  • Nikon 400mm f/2.8 VR
  • Nikon 1.4x TC
  • Phase One DF camera with an IQ160 digital back
  • Phase One Schneider 240mm lens
  • Sony RX-100


The Monarch Bataflae


Friday
Jun012012

Safari Update from South Africa - Day 1

This is the first installment of safari updates from the Sabi Sands of South Africa. I am on a 3-day pre safari with two of my customers, and at the end of this pre safari I will begin two back-to-back safaris, each with 11 travelers. My goals for writing these daily safari updates are:


  • To explain what we are seeing and photographing each day
  • To explain some of the camera equipment used and any thoughts around them
  • To show a day-in-the-life on one of my African photographic safaris
  • To create a diary for my travelers, so they won’t have to keep up with what we saw each day


So, here goes!

This morning we left the D’Oreale Grand Hotel in Johannesburg, and were picked up by my good friend Gordie, who runs a hospitality transfer business. Gordie took us to the hanger where our flight would take us to the Sabi Sands. We checked in, if you can call it that, and boarded our Pilatus PC-12 aircraft. 50 minutes later we landed at the Mala Mala airstrip, and my good friend and head ranger Matt grabbed us and took us to our camp for the next 3 nights. Every time I visit Mala Mala I make sure that Matt is my main guide, and this trip is no exception. We grabbed a nice lunch on the deck, got settled into our rooms and then took off for our afternoon game drive.

The weather this afternoon was almost perfect at around 75F. When I left home in Houston it was already getting into the 90’s each day, with an average low of the mid 70’s. I am not a fan of hot and humid places, and it was great to be in such great weather.

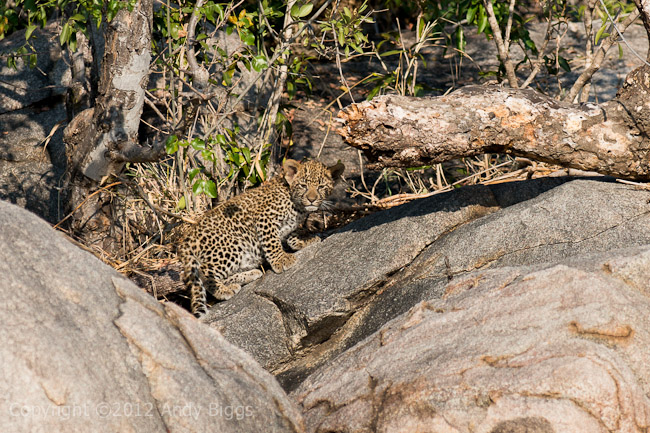
We had heard about a pair of leopard cubs from the Kikilezi female leopard, and made sure that we went straight for the place where they were last seen. It is important to be sensitive around any young cub, and since their mother wasn’t around we didn’t want to stay very long at all. If anything bad happened during our brief visit, the cubs would associate the event with the presence of a vehicle, and would forever be shy around them. We did spot the two 6-week old cubs, and for a quick reference I have included an image. It isn’t a great one, but the purpose of the images on these updates is to illustrate what we have seen out here.

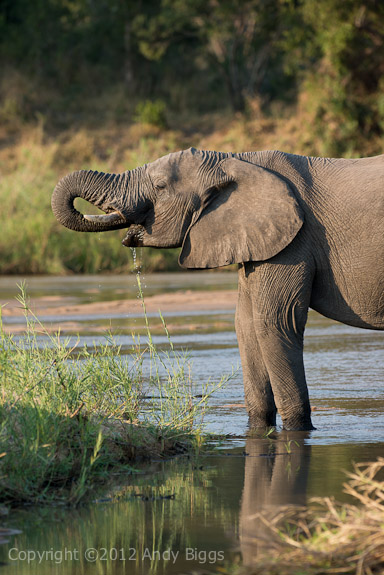
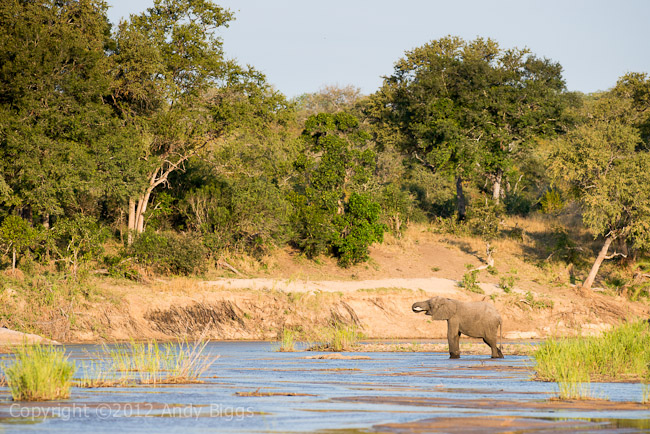
After our brief visit with the leopard cubs, we drove along the edge of the Sand River to see what was out in the open and easy to photograph. We happened on a small congregation of bull elephants, drinking and sparring at the waters’ edge. I love any animal that is near water, especially if there is interaction with the water (drinking, splashing, etc) or if there is a reflection. Or both! We took some shots and decided we would head down to the southern edge of Mala Mala where some wild dogs had been seen a few days earlier.

When we got to the southern edge of the property, we had to bushwhack our way through very very dense brush in an attempt to locate where we though the dog den might be. We had another vehicle in the area, and he was able to triangulate and figure out the location within an hour. We stayed a fair distance back from the den, and we only saw one adult female near the entrance. Awesome! This is the key to great wild dog photography, as you know where the epicenter of activity is coming from. All hunts begin and end from the den. We didn’t stay long, as it was obvious that the other adults had already left to go hunting, and there wasn’t much to see. We needed to make sure the dogs weren’t spooked by our presence, and staying back to observe and come back another day was the best approach.

We headed back to camp after dark, as it took a while to find our way back to the road from the dense brush. The temperature quickly dropped and my vehicle mates and I all had huge smiles on our faces from our first game drive of the trip.


Leopard Cub

Nikon D800, 300mm f/2.8, 1/3200 @ f/4, ISO 400. Hand held


Elephant in the Sand River

Nikon D800, 300mm f2.8, 1/640 @ f/5, ISO 400. Shot from a bean bag


View of the same elephant in the Sand River

Nikon D800, 300mm f/2.8, 1/1000 @ f/5.6, ISO 400

—————————————
Camera bags on this safari are sponsored by Gura Gear, which I started in 2008. Check us out. We make the best camera bags on the planet. :-)
Some of the gear on this safari has been provided by Borrowlenses.com. I rely on borrowlenses.com for both my own needs as well as my safari travelers’ needs. When we need big lenses, cameras or anything else photographic, we turn to borrowlenses.com to help out. They are the best resource in the industry for traveling photographers.
Tuesday
Jan032012

Antarctica - What Worked and What Didn't


Nikon D3x, 70-200mm f/2.8 VR2, 1/2500 @ f/5.6, ISO 400

I have been back from Antarctica for about 3 weeks, and I was hoping to have more information online (both photographs as well as text) by now. Obviously the Christmas holidays got in the way, but now I sit with pen and paper and want to write about some of the things that worked from the trip and some of the things that did not. Long blog posts somehow always escape me, and I am not sure why. I think that I am torn in so many directions on a daily basis, and it makes it quite difficult to do anything that requires more than 5 minutes of my time. Yes, I am a poster child for adult ADD, but we will leave that for another post.

As far as images go from Antarctica, I didn’t take that many raw files if I compare the quantity to some of my peers. I heard numbers that were in the 10,000+ range from most of the other passengers, but I only ended up with 3,000 or so. Why so few? I can honestly say that I was busy working with 68 travelers that I didn’t have much time for my own photography. I consider my primary job to be that of a leader and instructor, and not as a photographer. Heck, nobody is paying me to take photographs, and I think other workshop leaders out there need to understand who pays the bills and why we in the industry are doing what we are doing. It is a gut check for other people in the industry to lift up their heads and listen to what customers need and how to service those needs. This is a general statement about the industry and in no way reflects on my co-leaders / instructors from this trip! It is a diatribe about what is going on in the workshop / photo tour industry that has been bugging me for a while, and I finally found a few seconds to write about it. Ok, on to the rest of the story…


Yours truly. Photo courtesy of Joshua Holko


Of the images that I did take, I have found some great ones that I am quite happy with. The processing is quite challenging, and I am finding that Adobe Lightroom isn’t the best tool for the bulk of the development work. A very delicate touch is required to get the most out of these files, and I have not found the exact mood that I am after that will help me have a consistent look across my best ones. My workflow is: Lightroom for cataloging and global development work (white balance, exposure, black point and just a few other items), Photoshop for local adjustments with the aid of Nik Software plugins (Viveza 2 and Silver Efex Pro 2). I know that it will take me many months to process and release my best images, which is ok with me.

As you may know, I did take a ton of camera gear with me to the bottom of the earth:


  • Nikon D3x
  • Nikon D3
  • Nikon 16-35mm f/4
  • Nikon 24-70mm f/2.8
  • Nikon 70-200mm f/2.8 VR2
  • Nikon 200-400mm f/4 VR1
  • Leica S2
  • Leica 35mm Summarit-S f/2.5
  • Leica 70mm Summarit-S f/2.5
  • Leica 120mm APO Macro Summarit-S f/2.5
  • Leica 180mm APO Elmar-S f/3.5
  • Really Right Stuff TVC-24 with TA-2-LB leveling base and quick release system
  • Gura Gear Kiboko 30L
  • Gura Gear Chobe shoulder bag

Since this was my first trip to Antarctica, I somehow thought that by bringing a ton of gear I would at least be able to figure out what I needed by the 1st or 2nd day and only use the items that I needed most. Note: Leica loaned me the S2 kit for the trip, as well as for a trip earlier in 2011 to Moab, Utah. I am writing up a field review for Luminous Landscape that should be complete within the next few weeks.


Nikon D3, 24-70mm f/2.8, 1/2000 @ f/6.3, ISO 800


I ended up using my Nikon D3x and the Leica S2 the most, primarily because I favored larger file sizes over high ISO noise performance. Most of my D3x images were shot at ISO 800 or under and the Leica S2 was shot at ISO 320 or 160. I did have to push it to 640 a few times, but I was more comfortable with the lower ISO values. I didn’t have a single mishap with any of my 3 cameras, however I did see a number of Canon 5DMk2 and 7D bodies give up the ghost. Some came back from the dead and a couple did not. If you are planning on an Antarctica adventure, please be aware that you will benefit from having sealed cameras with you, such as the Canon 1 series bodies or the Nikon D3, D3x or D3s bodies. It really does make a difference.

Most of my images were captured between 24mm and 200mm, and I was surprised to see that my 24-70mm was my most used lens when I looked in Lightroom at the metadata. Very surprising. My #2 most used lens was the Leica 120mm, then the Leica 70mm, Nikon 70-200mm, Nikon 16-35mm and then the Leica 35mm. I am only speaking of my favorite images, which are less than 100. We had a nice balance between Canon and Nikon equipment, as well as Phase One, Hasselblad and Leica. I didn’t see much in the way of 4/3 system equipment, now that I think about it.


A landing on Deception Island

Leica S2, 35mm Summarit-S, 1/2000 @ f/2.5, ISO 160


I only used my tripod once, which was when I went hiking with my 200-400mm lens on a rainy and windy day. I am likely to leave the two items behind if I decide to go back to Antarctica in the future. With that being said, I will absolutely take the combination if I make it to South Georgia and the Falklands, due to more abundant wildlife opportunities. I did have a failure of a camera strap, and I feel fortunate that I was able to catch my D3x before it hit hard rocks below. I was using a Pacsafe Carrysafe 100 camera strap, and the connection hardware at the camera failed by snapping off at the swivel on one of the sides. UGH. I just feel fortunate to have caught my camera before it landed on hard ground.

I took all of my camera gear in 2 bags: the Gura Gear Kiboko 30L and Chobe. The combo worked perfectly, both for travel to get to Antarctica as well as for shooting in Antarctica. I did use the included rain cover for the Kiboko 30L on a daily basis, due to the rain, sleet and snow that we encountered almost every day.


Leica S2+ 70mm and Nikon D3 + 70-200mm VR2


I packed the perfect amount of clothes for this trip, and I am not sure what else to say about it. Laundry was always available, and there was no need to overpack. Quark Expeditions gave each of us a heavy parka for us to keep, and they had boots for us to use, and these were provided to us when we got on board the ship. What an awesome way to go, because I didn’t have to travel with large, heavy clothing. I did bring NEOS Adventurer overshoes, which are my biggest recommendation for anybody traveling to the frozen continent. These overshoes fit over my light hiking boots, and made walking in snow quite easy and comfortable. I have high arches and have Supertfeet insoles to help me with comfort. I did use the supplied rubber boots on one occasion and never liked how they felt, so I went back to my NEOS overshoes for all other excursions.

Since this voyage to Antarctica required the crossing of the Drake Passage, it goes without saying that I needed drugs to help me with the extreme rocking and rolling. Each passage took around 50 or so hours, and can only be described as not that much fun. Well, ok, it sucked. On the way down I used Scopolamine patches, which didn’t work at all. I needed something else, because I had nausea every time I stood up for more than 5 minutes. Scopolamine just made me sleepy as well as thirsty. Thank God I had another option, which was Zofran. I remember my mother used Zofran when she was going through chemotherapy, and if it is good enough for cancer patients it must be good enough for me. It worked like a charm, and my recommendation to Antarctica travelers is to always have 2 solutions to seasickness, just in case your first solution doesn’t work as planned. Quark had an on-board doctor with another set of drugs, and some of the travelers took advantage of the service. Needless to say, the Drake Passage on the way back was a 100% Zofran voyage.


Leica S2, 70mm Summarit-S, 1/250 @ f/8, ISO 320


My Antarctica adventure was a trip of a lifetime, and I look forward to the day when I am able to return. I feel fortunate that all of the gear that I took with me worked as anticipated, except for the mishap with the camera strap. I do feel sorry for those who were affected by moisture with their 5DMk2 and 7D cameras, and am glad that most were able to get them back working again. I think pro cameras are the way to go if one can financially pull it off to bring one (or more than one). I am a huge fan of renting gear, and Borrowlenses.com has a great rental program for such equipment.

Monday
Nov142011

My Cameras, Lenses, Bags and Accessories

I have been wanting to put together a mega blog entry on all of the gear that I use and why, and for some reason I have never gotten around to writing it. Well, here it is, and if you have any comments or questions I would love to hear from you. I will be following up this post with a couple of videos that will illustrate what I put in my camera bags and how I place it all in the bags.

Let’s begin with the camera bags that I use, as these are the things that are usually at the top of my mind (I wonder why. Yuk yuk).

Gura Gear Kiboko 30L

When I travel overseas with all of my gear, or if I need extra room in my bag for video products, my go-to bag is the Kiboko 30L. I designed this bag back in 2005, took the original one to market in 2008 and refreshed it in 2011, and the bag is still solving my main challenges of getting my gear on a plane and to my safari vehicle without hassles or issues. The 30L holds a TON of camera gear, yet only weighs 4 pounds (1.8 kg).
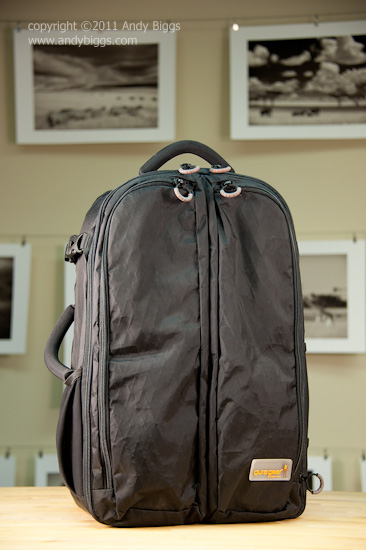


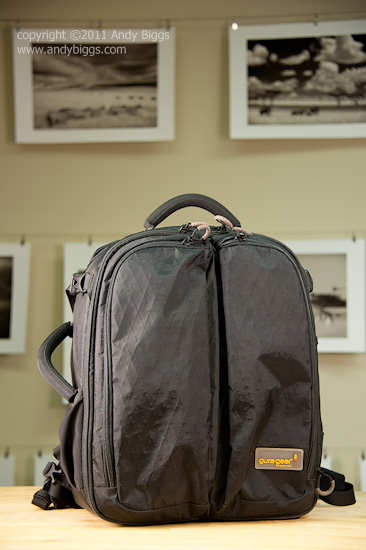
Gura Gear Kiboko 22l+

I use the Gura Gear 22L+ when I don’t need to carry all of my gear around, or when I don’t need my bag to be a staging area for 2+ cameras that are attached to lenses. I love the small and lightweight package, which makes it easy for me to get onto planes of any size without an airline employee freaking out. The 22L+ holds almost as much gear as the Kiboko 30L, but is 2/3 of the size. The 22L+ also has a more beefed up harness system than the 30L, so I may opt for the 22L+ if short hikes are involved.


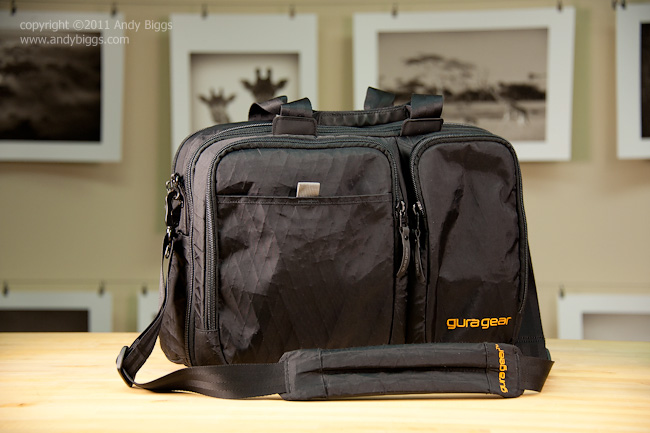
Gura Gear Chobe 19-24L

I always bring the Chobe bag with me, as I prefer to separate my camera gear from my laptop computer. I use the Chobe daily, moving computer, iPad and camera gear between my home and my office. The Chobe is my go-to bag, no matter what I am doing, as it mixes business with photography, and does either or both very well.


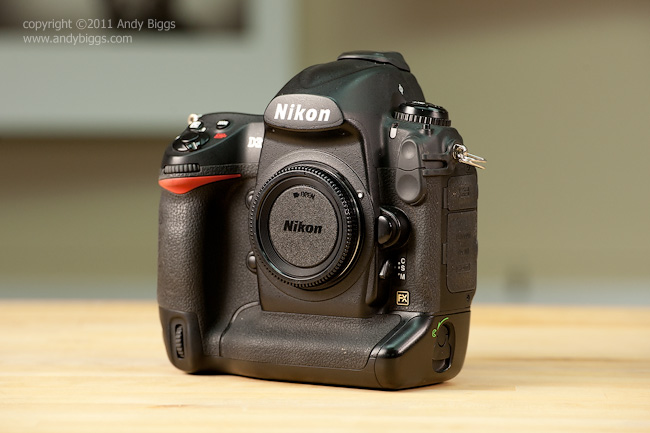
Nikon D3x

Ok, this is where I want to weep. Not really, but this is the one camera that I have come to love the most. I rarely use it at or near my home, but it is my preferred camera when I am shooting wildlife or landscapes. The challenge with the D3x is that is doesn’t do well above ISO 1600, and even then I prefer to limit the camera to ISO 800. The resolution is absolutely killer, and I love my 40x60” canvas prints that I can create from the raw files. Autofocus is in the same class as my D3, however it is a small amount slower to acquire a lock on moving subjects.


Nikon D3 (or D3s)

The Nikon D3 is my go-to camera for fast moving action and high ISO situations. I love to use this camera at the beginning and end of each day, when the sun is low in the sky and I need to rely on ISO settings at or above 1600. I also use the D3 when I need more frames per second for things such as running mammals or birds. The D3, D3s and D700 files are the cleanest and best looking images of any camera, bar none. So what is the downside? Well, quite simply the file size. The D3 uses a 12.1 megapixel sensor, which isn’t bad, but I do have to be careful when wanting or needing to print larger prints. For most subjects this is ok up to about 20x30”, but I have to have the right set of circumstances in able to print larger than that. My print sales business is the strongest in the 24x36” and 40x60” sizes, as I sell my work thorough a series of interior designers. Often these prints are used in commercial settings, such as board rooms and office common areas. So I tend to be very sensitive to output size, and the D3 is sometimes not enough to get me there. With that being said most of my images that get printed large are elephant, giraffe and non big cat types of images, and for some reason I have more sightings in better light of these subjects. So the D3x is typically used in those situations anyway.

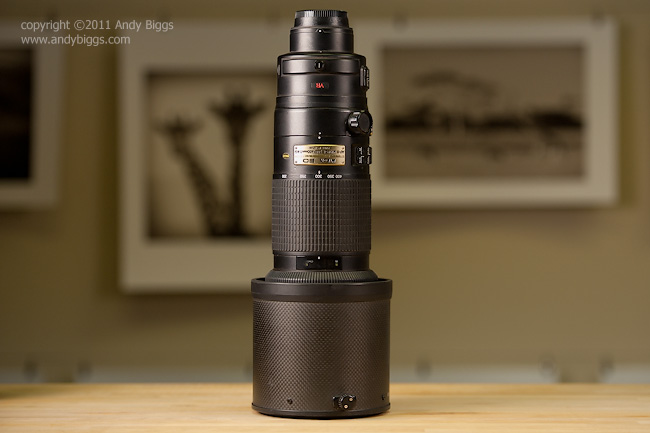
Nikon 200-400mm f/4 VR

The 200-400mm is my longest lens that I own. I used to be a Canon guy, and back then I used a 500mm f/4 as my longest lens. These days I tend to prefer my images a little more zoomed out, and 400mm is working for me right now. I do sometimes with for more when I am in Tanzania and Kenya, as the areas are much more wide open and the wildlife can be farther away, but that is when I might use a 1.4x teleconverter to get me a temporary reprieve. Optically the 200-400mm is pretty darned good, but it isn’t as good as a prime. The lens works best when stopped down to f/8 or f/11, which is where I call ‘home base’ for my shots.

I haven’t upgraded to the VRII, primarily due to cost, and perhaps I will get around to it someday. Oh, and I use a Really Right Stuff LCF-14 replacement foot, as it integrates an Arca Swiss compatible dovetail for easy use with either a ballhead or gimbal.
 

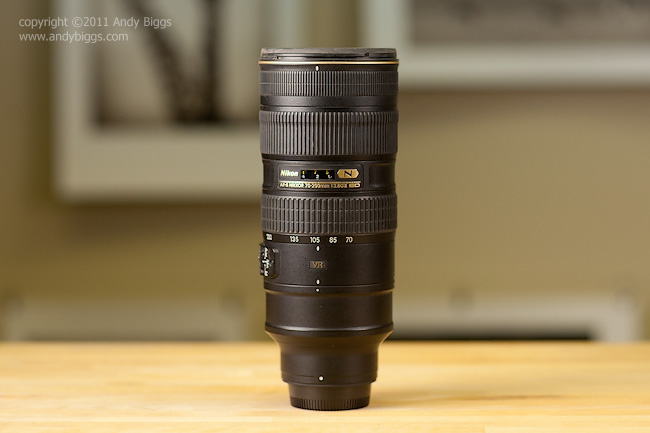
Nikon 70-200mm f/2.8 VRII

The Nikon 70-200mm f/2.7 VRII is likely the one lens that I like to use the most, but don’t find enough wildlife situations to use. I use it 50% of the time on game drives in Botswana and South Africa, and probably 25% of the time in Kenya and Tanzania. It is the longest lens I use for mountain gorillas in Rwanda. I love this lens because it focuses quickly, it has great performance wide open and it is easy to hold without any support. This is the one lens that every nature photographer should own, whether you are a landscape or wildlife photographer.


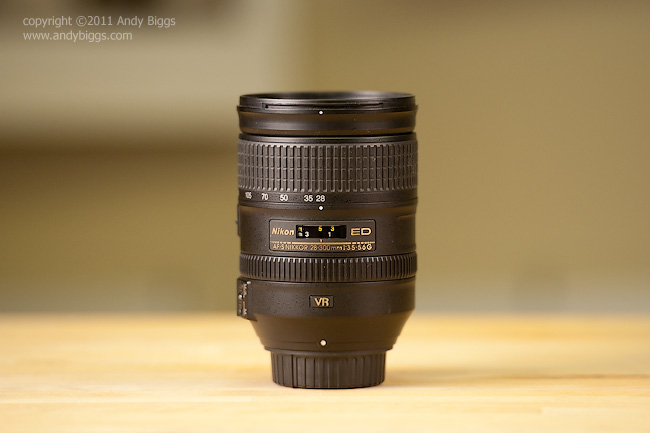
Nikon 28-300mm f/3.5-5.6G

I have a love/hate relationship with this lens. I love that it can be a single lens that I take with me on a family trip, but I don’t like that the zoom and focusing rings are inversed from all of my other lenses. The zoom ring is on the outside and the focusing ring is on the inside? What gives, Nikon? Sheesh. The lens hood needs work as well, because there are some very thin parts of the plastic that are easily broken (this has happened twice). Optically it is a decent lens between about 50mm and 200mm, but longer than 200mm and it starts to get soft. If stopped down to f/11 it gets good, but then again I am not likely to use this lens on a tripod to begin with. I have used the lens for all of my Albuquerque Balloon Fiesta workshops for the past 3 years, and have enjoyed working with only 1 lens.


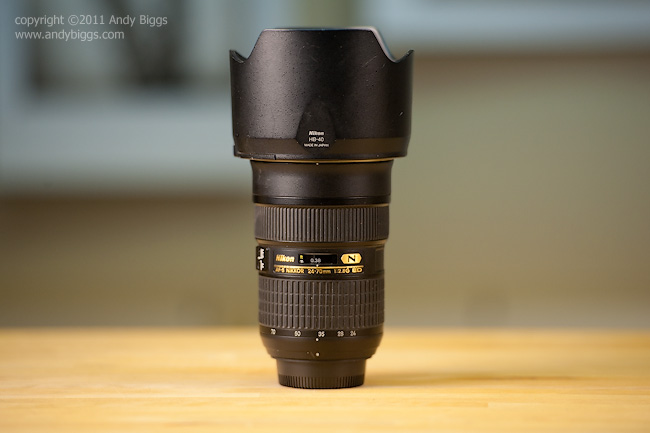
Nikon 24-70mm f/2.8

I used to use the 24-70mm all of the time with my family, but in recent years have preferred to use faster primes for ultimate quality. For landscapes I am more likely to shoot with a 16-35mm or a 70-200mm, so the 24-70mm rarely gets used for those types of trips. I do use the 24-70mm as my widest lens when in Africa on safari, whether for landscapes or for general people shots. I do wish that Nikon had a 24-105mm f/4 type lens, and the 24-120mm isn’t a viable option for me. I have tried it a few times and I won’t purchase it.


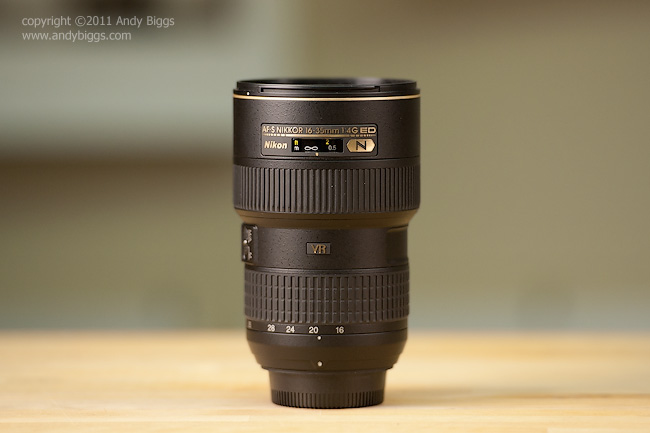
Nikon 16-35mm f/4 VR

Now this is a lens that I absolutely love. I sold my 17-35mm f/2.8 to afford this lens, and optically it is a much better product. I never need f/2.8 for this type of lens, so I was ok with moving to an f/4 lens. I use the lens for doing camp interior shots in Africa, either for stills or video.


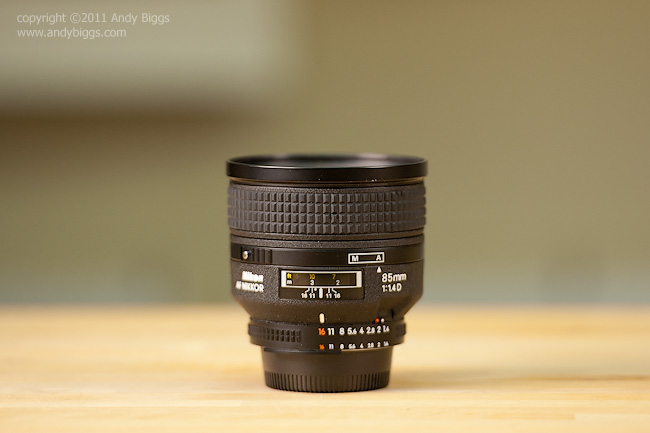
Nikon 85mm f/1.4 IF

Here is where the fun really starts. The 85mm f/1.4 (the last generation) is my go-to lens for doing family shots in the backyard. I don’t use it wide open very often, as I am always fighting depth of field, but am usually shooting between f/2 and f/2.8. One drawback to this lens is that it isn’t as fast at focusing as the latest ‘G’ version. Another downside is the threaded screw-on lens hood. It is made out of metal, though, which is a nice tough. Old skool, and I like that.


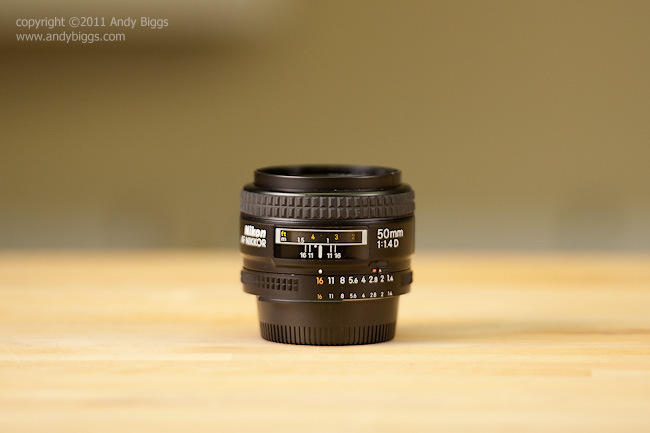
Nikon 50mm f/1.4

I think this is the one lens that all of us has owned at some point, yet most of us don’t use often enough. It is the least expensive lens in my bag, for sure, and I don’t use it often enough. My goal is to mate it with my D3 for a month and only use the combo for my family photographs and see how I like it after that. I have never taken this lens overseas, but that will change when I start running more cultural trips in Africa. I have visited many cultures throughout Africa, and it was just a matter of time before I put trips together to photograph some of these amazing people. Stay tuned.


Other Camera Equipment

I also own a Sony NEX-5 with 2 lenses: the 16mm f/2.8 and 18-55mm f/3.5-5.6. I also have the accessory flash unit as well as external microphone. I love the NEX platform, and I take the NEX-5 with me on all of my trips, domestic or international. The size, weight and image quality are perfect for my needs, especially for people or group ‘grab shots’. I would love to upgrade to the newer NEX-7 when they area available.

Nikon SB-900 flash

I rarely use this baby out on safari, but I use it all of the time for family shots and portraits. I have a set of Pocket Wizard remotes, which I primarily use for product photography with SB-900 flashes (Gura Gear studio shots of our bags).

Parting Thoughts

I often get questions like ‘which lenses should I buy’ or ‘what is your best recommendation for a starter kit’, and these are difficult questions to answer. They are difficult because I don’t know what the budget it, I don’t know how much gear is too much for you and I don’t know what are you wanting to photograph. With that being said, I think that every nature photographer should own the ‘holy trinity’ of lenses that will get you started:

16-35mm

24-70mm

70-200mm

These 3 lenses will get you most of the way, if not all of the way, towards filling your bag up. Yes, these lenses add up to a princely sum, but there is a reason that most full time nature photographers own all three of them, and that is because they are wonderful general purpose lenses. Sprinkle in a few specialty primes and a long lens for wildlife and you are all set up.

Tuesday
Oct182011

Gura Gear Kiboko 22L+ is now available!


You spoke and we listened. You asked for a smaller Kiboko bag. We made it. You wanted a place to put a laptop computer. We added it. You wanted a removable waist belt. You got it. You want to travel to places across the globe with less stress. You wanted a beefed up harness system that would be comfortable for longer hikes. We heard you loud and clear. Here it is, the new Gura Gear Kiboko 22L+.

Before I go into product details, I want to tell you that I and the rest of the Gura Gear team have been working hard at delivering your needs and desires, and this isn’t the last product you will see from us. Our design philosophy is to make products that we want to use ourselves, and after many many trips around the globe with 22L+ prototypes, I think we nailed it. I hope you think so, as well.

Kiboko 22L+ details

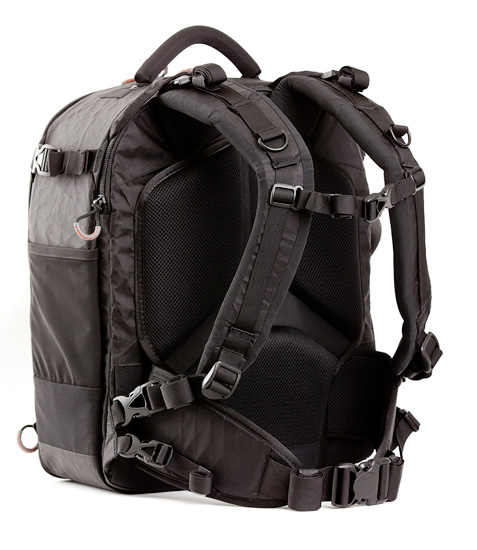
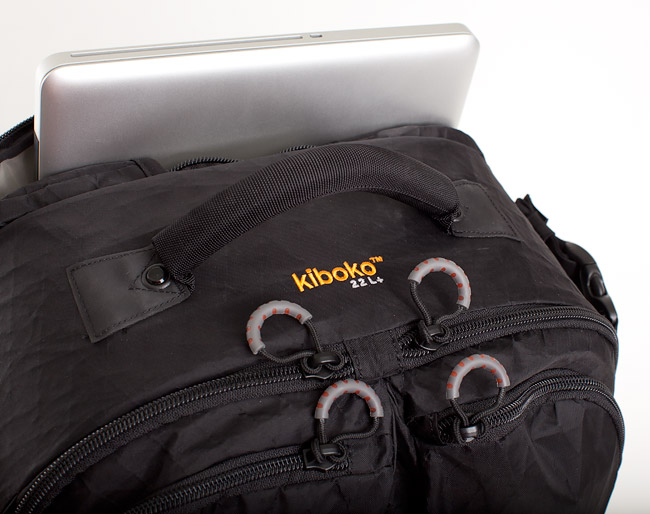
The Kiboko 22L+ was designed from the blueprints that our customers provided over the last couple of years while working out on Safari, touring southeast Asia, or simply shooting at home. Much like its more mature sibling, the Kiboko 22L+ is lightweight and durable, but this bag has a thing or two to teach big brother; like  how to carry up to a 15” laptop computer. Sized to fit the most stringent of international carry on requirements without sacrificing carrying capacity; this gem can carry up to a 500mm f4.0 lens in style. The Kiboko 22L+ was made to travel with a beefed up harness system that features memory-foam shoulder straps, a vented and padded back panel, a removable waistbelt and shoulder straps that can tuck away when not needed.

While remaining true to the Kiboko DNA, the 22L+ features a unique butterfly flap access system which allows you to easily get to multiple bodies, lenses, and all your photo accessories without exposing all your prized gear. Kiboko backpacks are made of high-tech materials designed to balance weight and durability. Used by some of the fastest sail boats in the world, VX-21 has a superior strength to weight ratio while remaining abrasion- and tear-resistant. VX-21 is expensive, but your gear is worth it.

Highlights

  • Customer driven design
  • Carries up to 15” laptop
  • Fits most DSLR bodies
  • Will accomodate up to 500mm f4.0
  • Unique butterfly-style opening
  • Made from high-tech, durable sail cloth material
  • Comfortable, fully-functional harness
  • Removable waist belt
  • International airline carry-on compliant
  • Removable rain cover
  • Exterior Dimensions: 14x18x9 inches (35.6 x 45.7 x 22.9 cm); 22 Liters useable


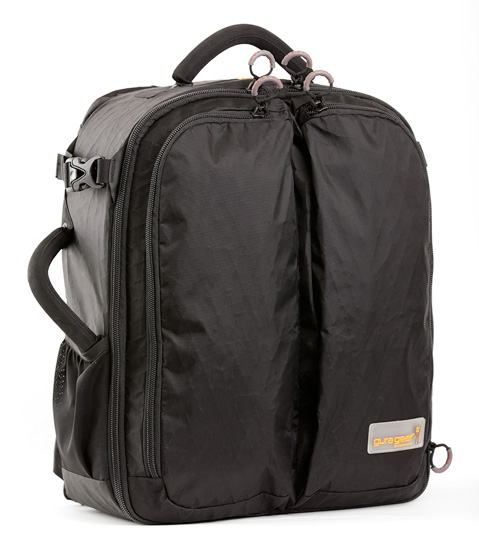
Kiboko 22L+ front view


Kiboko 22L+ rear view. The waist belt is removable!


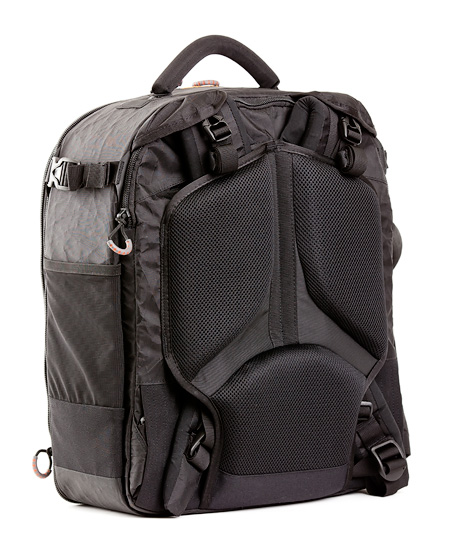
Kiboko 22L+ rear view with harness system hidden away


Kiboko 22L+ accommodates up to a 15” laptpop computer


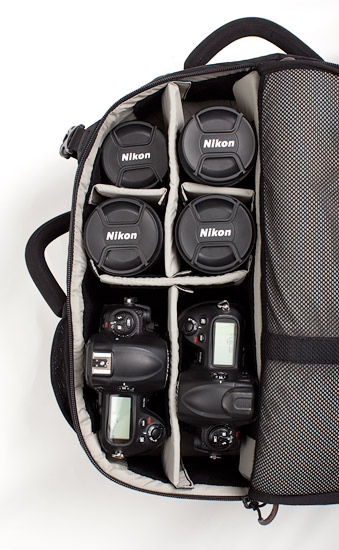
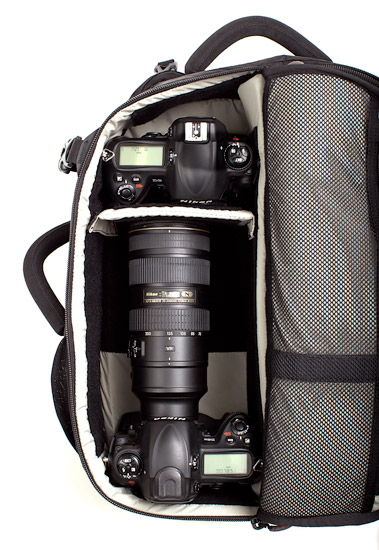
Kiboko 22L+ with my configuration from my last trip. Gear, from top left to bottom right: 85mm f/1.4, 24-70mm f/2.8, 28-300mm f/2.8, 16-35mm f/4, Nikon D3s, Nikon D3x


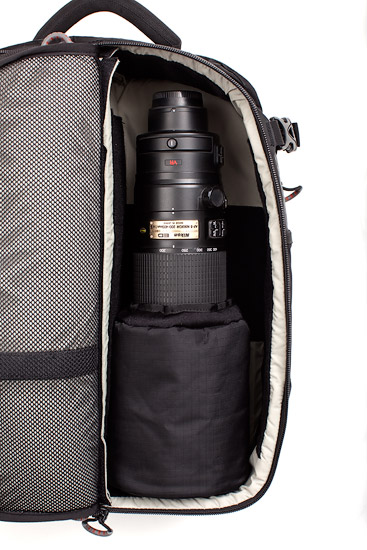
Kiboko 22L+ with my 200-400mm f/4 on the other side. The 22L+ can accommodate up to a 500mm f/4 lens.


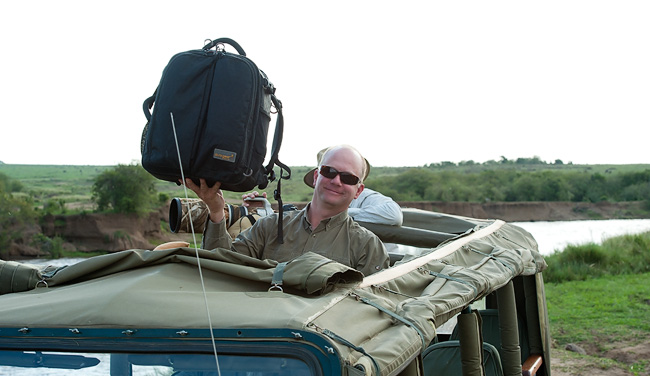
22L+ is easy to shoot out of, just like the bigger 30L brother.


The all-new Kiboko 22L+ is lightweight at only 3 lbs 15 ounces, yet allows for easy travel


Discover your next object of desire, the new Gura Gear Kiboko 22L+